What Are The Best Wingspan Strategies?
Read this Wingspan Strategy Guide and join us as we do a deep dive into the best Wingspan Strategies. Reading this guide will lead to a deeper understanding of the game and more consistent wins. Our 14 Pro Tips will be The Winning Edge you need to rule your roost!
Pro Tip #1: Understand Wingspan Strategy Fundamentals
Efficiency and Optimized Scoring
At the start of the game, it is important to identify what resources will be your most scarce based on your opening hand. It may be imperative to get a couple of birds down in the Forest to get your food production to where it needs to be. You will eventually need more cards to play, and you will also need eggs on the board to start playing birds into the second column and beyond.
Prolonged stalling in any one resource is all that it takes to give your opponent the win. Picking an early-game focus and leveraging that as hard as possible can help accelerate you into a strong position by the mid-game. During these earliest turns, efficiency is paramount.
The opening plays of a game can vary wildly in overall impact based on the decisions the players make and what cards they have access to. The more efficient your plays are in round one, the more efficient each successive activation is after that. If you can play that mini-game better than your opponents, you stand a much better chance of victory than they do. See Pro Tip #4: Effectively Starting Your Engines and Build the Right Way for more on this.
When possible, play birds that align with your bonus cards and the end-of-round goals. This will increase the point-scoring efficiency of each piece of food and the action cubes you spend to play birds. You only get twenty-six cubes, so make them count!
When being mindful of scoring these extra points, you may end up with scores and wins that surprise you. When this happens, it’s a good sign that you are playing efficiently. Be aware that there will be situations where ignoring bonus cards and round bonuses is a better strategy. See Pro Tip #9: Learn How to Pick the Best Bonus Cards for more on this.
When choosing what birds to play, consider the efficiency of food costs vs victory points scored, both in the short term and the long term. A bird that is worth five points and only costs one food, such as Spotted Sandpiper (CS), is a highly efficient play for immediate points. Conversely, Lesser Whitethroat (EE) costs two food, is worth zero points, and can only hold two eggs.


At first glance, this seems terrible, but its end-of-round power can passively score you many points through eggs over the course of the game if managed properly. Its poor general qualities are a way to balance this powerful effect. It can effectively allow you to ignore the Lay Eggs Action, which is an efficiency in the form of saved action cubes, the game’s most valuable resource.
Long-term game efficiency is created through the micromanagement of this bird’s power. If a bird will not generate short-term or long-term efficiency for you, like in the examples above, it’s probably not worth playing it.
As you enter the second half of the game (rounds three and four), you are generally going to want to start dropping “point bombs,” that is, bird plays that result in as many points as possible per activation. Great Egret and Atlantic Puffin are great examples.
More good examples would be Wild Turkey (CS), Black Noddy (OE), and Bonelli’s Eagle (EE). Mass egg layers such as Bobolink (CS) can be great point bombs if you have several spaces of the appropriate nest open.

As you approach the end of the game, big point birds will often represent your best scoring actions. Playing a point bomb for eight points is better than activating an engine that only scores you four points. I’ve observed that when new players get their habitats up and running, they tend to focus on how good activating an engine feels and not on how many points they could score by playing a big point bird with that action instead.
The Feel of the Game
Some people may feel that the game is too short. I think this feeling may stem from a lack of efficiency during play. People are flooded with so many options, new opportunities to try a card, and new combinations, that they exhaust their twenty-six activations before anything comes to fruition in a meaningful way. A lack of focus can be especially detrimental to new players.
You could spend 75% of the game exploring your options and then fail to focus until the game is just about over, resulting in feelings of, “aw man, I’m just getting started!” Action efficiency is an important element of engine-building games. They require you to compound your resources more effectively than your opponents in order to win.
Some players lengthen the game by deliberately using the Oceania Expansion’s “No Goal” round goal for Round One of every game. This ends up giving players several more actions over the course of a game. Before the Oceanian Expansion, I recall reading reports of people just adding a fifth round to the game. These are “house rules,” of course, and are not how the game was designed to be played.
As people gain more experience, I believe they instinctively become more focused and deliberate in their activations. They learn what works and what doesn’t. I would suggest that if you feel that the game is too short, you should spend some time reflecting on what you try to accomplish each game and try to find ways to focus strategies to a fine point as much as you can, as early as you can. Using what you learn in this Wingspan strategy guide, you will do just that.
Pro Tip #2: Remember These Wingspan Strategy Guidelines
1. Beware of Bias
In any game you’re learning and starting to understand, it can be easy to fall into a trap where you develop a favorite strategy, and you might start to feel like it is the best way to play or that other strategies aren’t as viable. This happens a lot. We all fall victim to it at one time or another.
While developing your skills, I strongly suggest that you try things that you wouldn’t normally try when the opportunities present themselves. You may learn something new about a card or strategy that you had never considered before. What you discover may even result in a better play philosophy and a new high score.
The digital version of Wingspan (available on multiple platforms) is a great way to play a lot more games in a shorter period and really develop an understanding of the fundamentals. This is due to the automation of scoring and execution of the bird powers as well as the elimination of the setup and tear-down time of the physical board game.
2. Know How to Cache/Discard Food Effectively
Caching food from your personal supply is the worst form of caching because this food could otherwise be multiplied into several victory points by playing birds. Caching effects and some food discard effects convert food into points at a 1:1 ratio.
Thus, three food from your supply can be converted into three points through caching (usually over multiple turns through brown powers), or it can be multiplied into a maximum of nine points by playing a high-value bird with a single action. Caching from the birdfeeder or the general supply is much more desirable because that food doesn’t have the ability to convert into points through the Play A Bird Action.
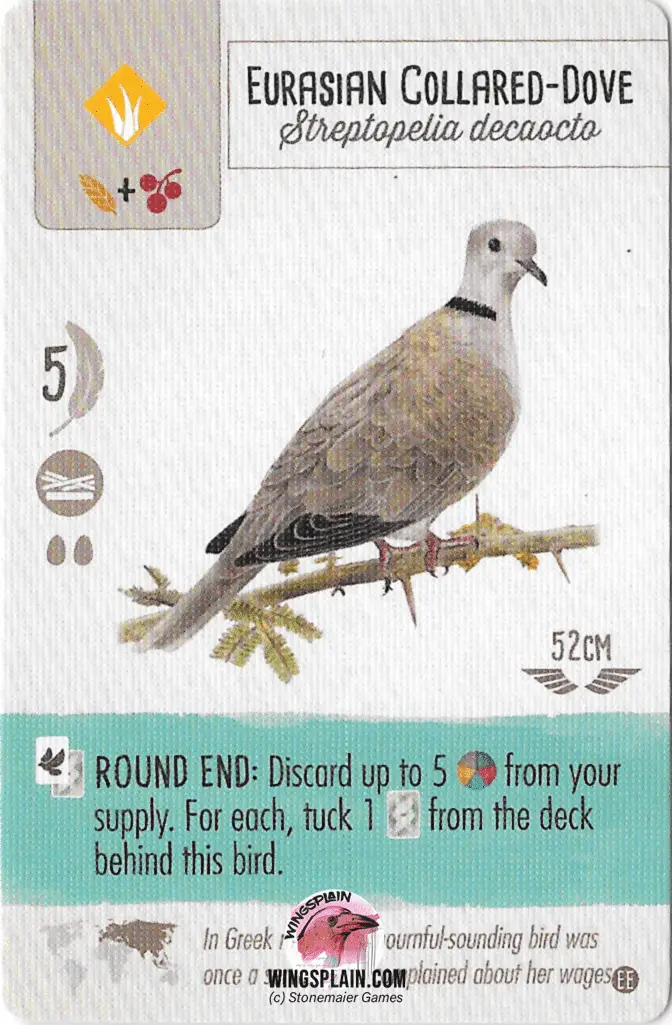
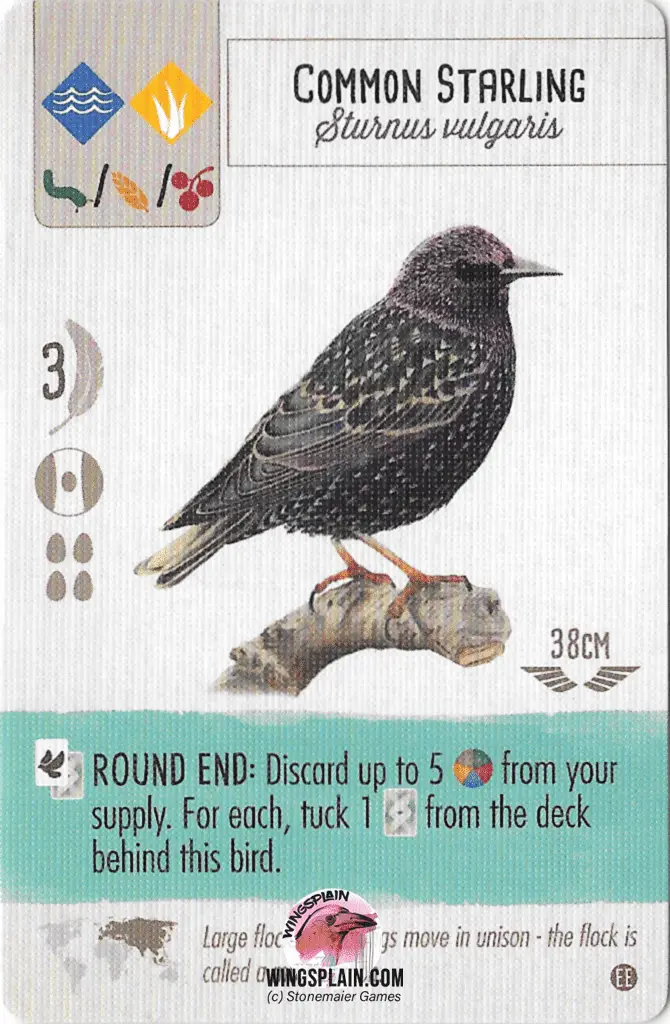
That being said, there are times when you end up with a surplus of food that you are having a difficult time spending in a way that scores points effectively, such as having a bunch of fish from an opponent’s Osprey (CS) just lying around and stinking up the place and your cards in hand are of low quality. This is where passive caching/food discarding birds such as Australian Raven (OE), Eurasian Collared Dove (EE), and Common Starling become compelling options, as they convert food into points passively and don’t require an action to activate.

If these passive birds end up having highly desirable general qualities as well, all the better, as they bring extra value on top of their power and serve an effective purpose if their power ends up resulting in zero gains.
Some cards, such as Canada Goose, discard one food and score two points. This conversion of food into points is generally a better return on investment than standard caching effects, and these birds are at their best when directly supported by another bird that provides the necessary food as a part of an engine combination, such as Spotted Towhee.
3. Know How to Avoid Discarding
If you’ve employed a bird that requires you to discard cards at the end of your turn, keep an eye out for ways to tuck excess cards that you have in your hand before you must pay that piper. If there are zero cards in your hand, you have nothing to discard. This lets you circumvent a drawback attached to some card-drawing powers.

4. Understand the Power of Tucking
Some bird powers let you tuck a card from your hand and then draw a card to replace it. These birds can be a valuable way to cycle through a larger volume of cards, improving card quality while also scoring points. The more cards you see, the more likely you are to see the best options.
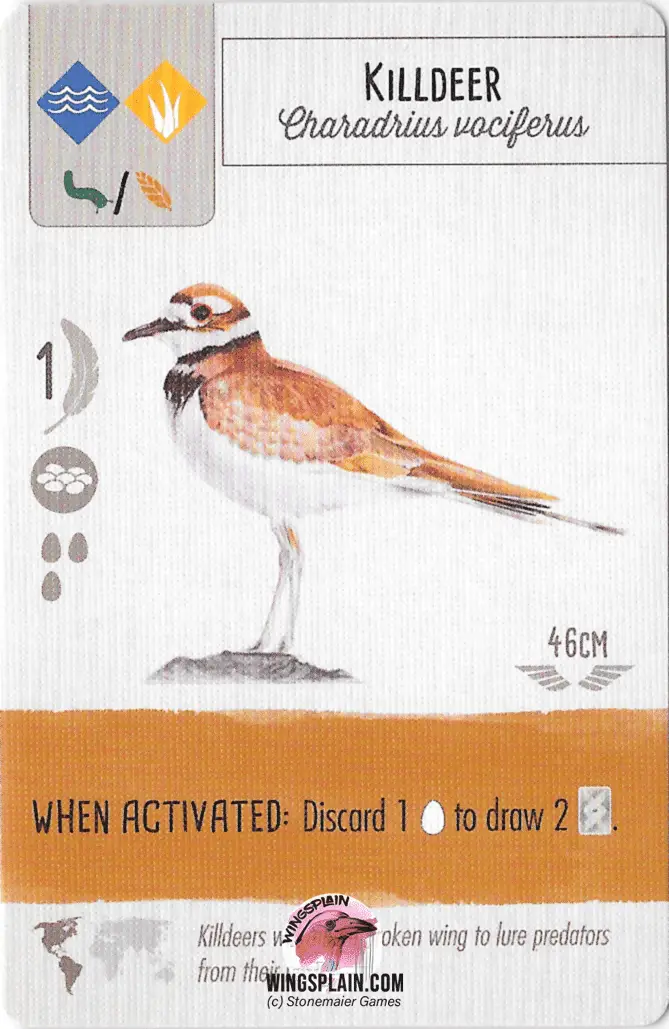
This cycling power is at its most efficient and flexible in the Wetlands where you are generating the fuel for it (cards). If you manage to maintain one card in hand for tucking fuel, playing several of these birds together in the Grasslands can create a tremendous point-scoring engine through tucking and egg-laying. They pair exceeding well with Frankin’s Gull, Killdeer, and/or Wood Stork.

Some bird powers let you tuck a card from your hand and then lay an egg on that bird, such as Red-Winged Black Bird (CS). These can be harder to employ outside of the Wetlands because they don’t replenish their own fuel, but they are noteworthy for scoring two points from a single activation. These birds are great at generating eggs in the Wetlands, something that is otherwise hard to do, as many birds with this power can live there.

Powers that let you tuck from your hand are harder to maintain when they don’t replace those cards, or they aren’t a part of a Wetlands engine. If you can’t maintain a surplus of cards in your hand, tucking from the deck is generally better than tucking from your hand for point-scoring purposes.
Since you may not be able to consistently keep cards in your hand (especially if you want to play more birds), you could miss an opportunity to score. Tucking from your hand eliminates an option/resource and reduces card advantage. Tucking from the top of the deck doesn’t cost you anything.
This is the same concept of caching food from your personal supply vs. the general supply or birdfeeder. A card in hand can be converted into multiple points through the Play A Bird Action, which is better than tucking it for just a single point. Of course, if the card you have is worthless to you, tuck away! That’s an efficient conversion of a dead card into points.
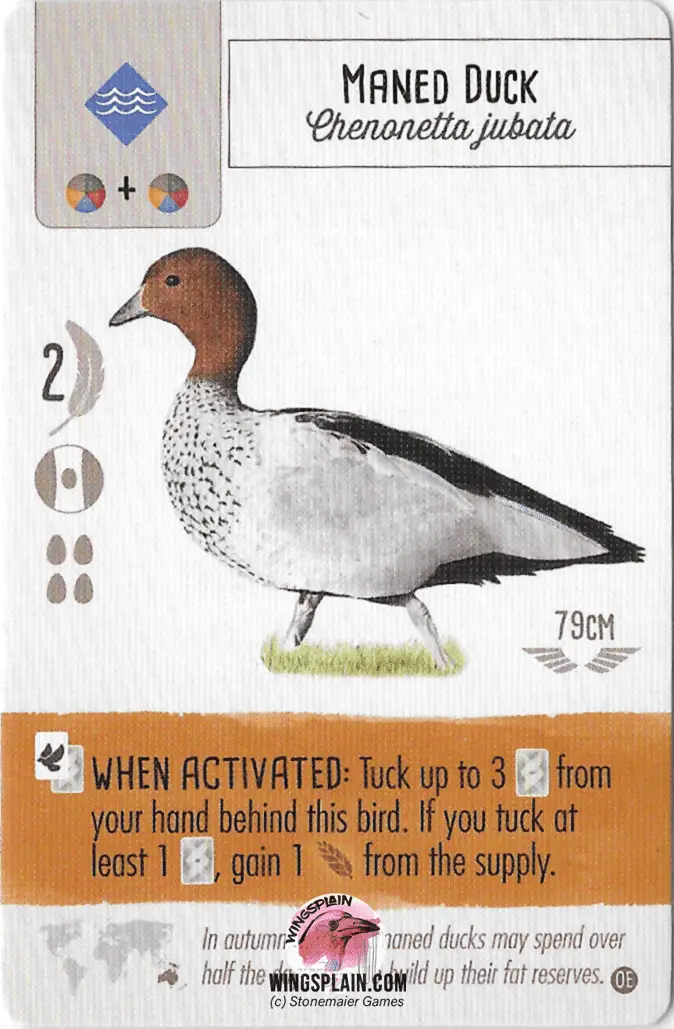
The European Expansion introduced some birds that take tucking to the next level and allow you to tuck multiple cards at once. Maned Duck is also worthy of note from the Oceania Expansion. Some of these powers require that these tucked cards go under multiple birds (requiring you to build out your infrastructure).
Others will tuck multiple cards under themselves (requiring minimal investment in that habitat). I call these birds “Mass Tuckers,” and when leveraged with singlemindedness, they can produce surprisingly high scores resulting from some of the highest-scoring engine activations.
Tucking isn’t capped like eggs are through nests. You can theoretically tuck an infinite number of cards. These mass-tucking strategies can often generate so many points that it becomes worthwhile to ignore other avenues of scoring and focus solely on building out a deeper engine that scores five, six, or seven points per activation. That’s better than playing most birds, and it doesn’t require gathering food or eggs first to score.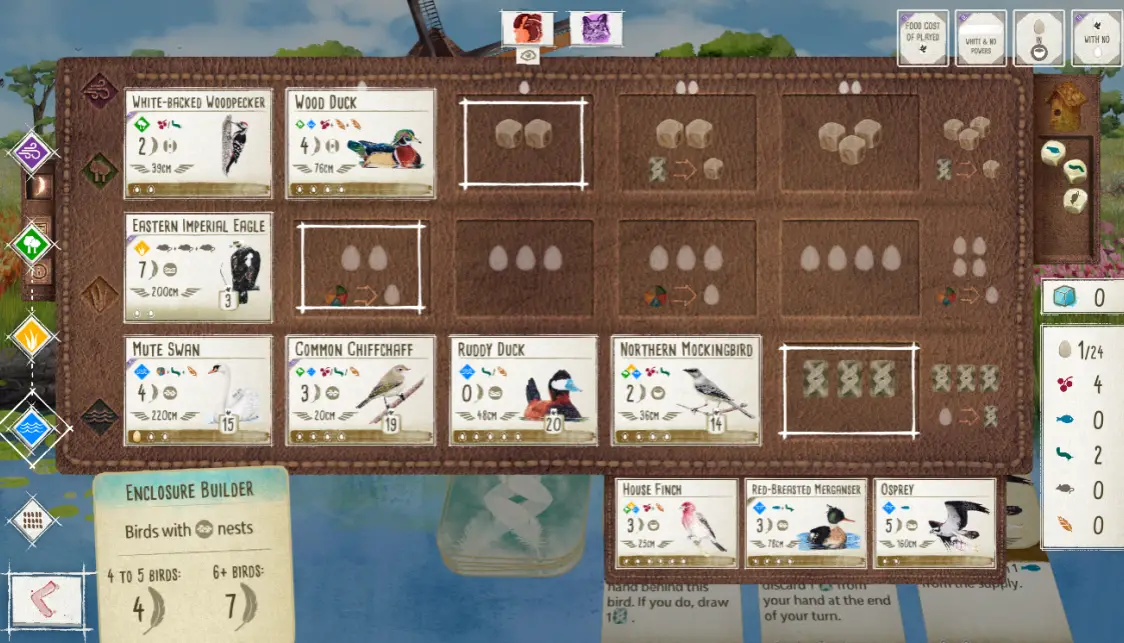
5. Know How Many Eggs You Need
A full board of fifteen birds will cost you eighteen eggs in total. Most people in most games aren’t going to play fifteen birds and fill up the mat, but it could happen. In most games, you will probably end up using less than twelve eggs to play birds. While the Grasslands might have an inherent advantage in the point value of eggs, engines in this habitat are not the only ways to win a game.
6. Know The Limitations of Predator Powers
Predator Powers that involve “rolling dice outside the birdfeeder” to cache fish or rats (a common core set power) are among the weakest point-scoring powers in the game. These powers are conditional and have a low success rate. At four dice (the maximum possible), this power is a coin flip.
Predator Powers that check the wingspan of the top card of the deck to tuck are among the weaker point-scoring powers in the game. Their abilities are conditional. Some have lower success rates than others. As of the Oceania Expansion, the best version of this power is “<100 CM,” which succeeds about 80% of the time.
7. Plan Effectively to Play Extra Birds
“Play Another Bird” birds, such as Great Egret (CS), break the action economy of the game in your favor by doubling your “Play A Bird” actions. Unfortunately, these are resource-intensive actions without that many discounts (the OE birds of this archetype allow you to ignore one egg in the cost to play the next bird). These plays benefit a lot from the shared resources of other players and are at their best when you can score as many points as possible with the activation.
A noteworthy play would be Great Egret, followed by White-Faced Ibis (CS), fifteen gross points. You can even stack this effect from multiple birds back to back. An example would be playing Great Blue Heron (CS), then Great Egret, then Atlantic Puffin (CS). Hopefully, you score a choice bonus card from the Puffin. This would cost you a lot of food and eggs, though, so you have to plan and build into these types of actions, but when you pull them off, they represent some of the highest-scoring plays in the game.

8. Know When to Acquire Bonus Cards
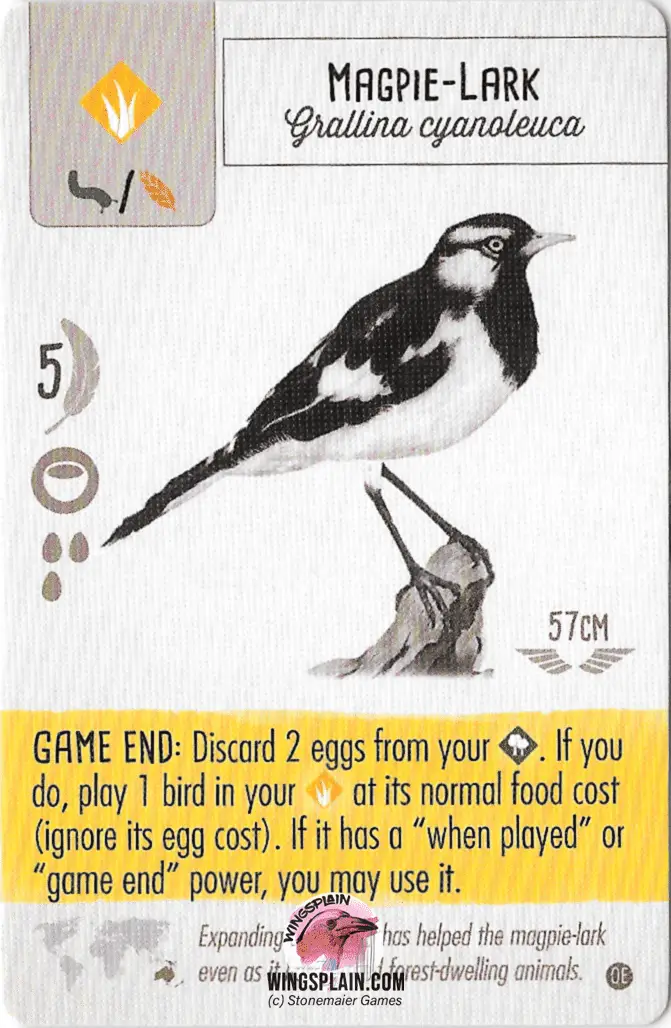
Bonus Card birds, such as Wrybill and Abbott’s Booby (Oceania Expansion), tend to have more impact when played in the mid to late game, as you can cherry-pick bonus cards that score you points right now as opposed to trying to build into points from the start of the game and being at the mercy of the deck.
You have the benefit of looking at what you have already played and knowing what you want to try to play in the future. These birds can be random, though. Veteran Wingspan players are familiar with the sour taste of a whiffed bonus card draw.

9. Know When to Let Good Cards Go
There are windows of opportunity for even the best cards. Most “When Activated” powers (brown powers) and “Once Between Turns” powers (pink powers) are at their peak at the beginning of the game and drop off substantially in effectiveness as you near the end. This is because brown and pink powers want to be activated repeatedly by their very nature. They increase the efficiency of your action cubes incrementally over the long haul and create snowball effects.
Each of the power types has its time and place and can have varying levels of impact based on the timing of their play. This is where a lot of nuance comes into play with Wingspan and where the game reveals its depth.
10. Know the Impact of Increasing Player Count
Increasing the player count will have a noticeable impact on the game for a few reasons:
- The birdfeeder and bird card tray will cycle faster, preventing stagnation in either one while offering more options for all players.
- There is more opportunity for players to use shared resource birds, making it easier to gather resources and play cards.
- There is more opportunity to take advantage of passive pink powers.
- There will be increased competition for round bonuses, making it harder to score with minimal investments.
- There is more opportunity for the best cards to be drawn by your opponents and not you.
- It will be harder for any one person to run away with points scored from nectar (introduced in OE) as there is more competition to gather and use it. This increases the tension surrounding nectar in an enjoyable way, in my opinion. See Pro Tip #7: Understand the Impact of Nectar for more.
Pro Tip #3: Understand the Function and Impact of Each Habitat in Wingspan
Forest Habitat
In my experience, Forest engines tend to be weaker engines without the Oceania Expansion. If possible, add a couple of point-generating birds to your Forest engines, such as Carolina Chickadee (CS) or White Breasted Nuthatch (CS). This will allow you to score points from the Gain Food Action and attempt to compete with Grasslands egg-laying and Wetlands tucking strategies. Note that these two birds do not cache food from your personal supply, which would slow down your development.
The Forest habitat was improved in the Oceania Expansion, getting you more resources with less development. This accelerates your ability to convert food into points through the Play A Bird Action. The Forest is also the gateway to the most reliable source of Nectar if you’re playing with Oceania rules.
How To Play Wingspan Forest Engines
Grasslands Habitat
Due to its potential to score several points per activation, even without bird powers, the Grasslands end up being a highly influential habitat. Most strategies can manage to scrape together some food and some cards, but it is noticeably more difficult to acquire eggs outside of the Grasslands.
The Wetlands have a leg up on the Forest in this regard due to Tuck/Lay birds. This is probably why people tend to spend more time talking about Pileated Woodpecker (CS) and not Red-Winged Black Bird (CS) by comparison; laying eggs in the Forest tends to be a bigger deal. Eggs themselves are inherently valuable (one point each).
Food is only as good as your cards in hand, and your cards in hand are only as good as the food in your supply. Eggs are always eggs and are always worth something without requiring extra actions or powers to convert them into points.
It’s no surprise that some people felt that egg spam strategies were a problem in the younger days of Wingspan (even if they didn’t fully understand why it was an issue; it just felt “broken” and/or “boring” to some people). This is also why the nerf to the Grasslands and the buff to the Forest and Wetlands were such a big deal on the Oceania Expansion mats. They didn’t just make it harder to generate eggs. They made it easier to generate food and cards as well.
Playing point-scoring birds in the Grasslands facilitates some of the highest scores in the game. Laying eggs on top of scoring points through other means (tucking, caching, egg-laying powers) gives the Grasslands an advantage over the Forest and Wetlands, which must jump through extra hoops to convert cards and food into points.
The true limiting factor to any Grasslands Egg Spam strategy is the nest capacity of all your birds in play. Unless you can manage to effectively build out your nest infrastructure, you will quickly fill them up and have a steep decrease in overall efficiency.
This is the core principle of why The Power Four (see definitions) are so impactful. They address the key weakness of the Grasslands by providing food and cards that directly convert into more nest infrastructure, all while spamming eggs for a net gain in points and resources.
How to Play Wingspan Grassland Engines
Wetlands Habitat
A fist full of cards won’t do anything for you unless you happen to have the Visionary Leader bonus card. As previously mentioned, cards themselves are not inherently valuable and are only as good as the food you have in your supply or the tucking powers you have at your disposal.
An element of the game that all players should be aware of is the concept of “card advantage”. This concept is simple. Cards equal options. Whoever draws the most cards has the most options by default. Whoever has the most options available to them is usually going to win whatever game they are playing.
The Wetlands allows players to draw a lot of cards (options). The worst of those options can be discarded for resources from the appropriate spaces in the Forest, tucked for points, or discarded to effects that force you to get rid of cards in hand.
Tuck/Lay birds become especially versatile in the Wetlands not only because that habitat produces the cards to fuel their egg-laying powers but also because those eggs can be discarded to draw even more cards from the appropriate space in the Wetlands (if these birds fill up their own nests, you might as well discard those eggs for different resources). This gives you a leg up against your opponents in the race to acquire and play the best options.
If you create a tuck/draw engine in the Wetlands, you are going to be cycling through and drawing a much larger percentage of the card pool compared to your opponents, who aren’t doing the same thing. This means you are going to see the best cards a lot more often. You’re also more likely to find birds that fulfill bonus card and round goal requirements at a much higher rate. This is a critical element of winning consistently.
Like the Forest, the Wetlands habitat was buffed on the Oceania Expansion mat, offering more resources earlier and more options for bonus conversions.
Pro Tip #4: Effectively Start Your Engines and Build the Right Way
Early Game Acceleration
Hitting the ground running from the start of the game should always be your goal. The more efficient you can make your first, second, and third activations, the more efficient your fourth, fifth, and all subsequent activations will be.
Doing this better than your opponents will go a long way to securing a win, and it helps mitigate the impact that luck might have on a game. Compounding efficiencies and resources better than your opponents is a key element to winning any engine-building game. Following the principles in this Wingspan strategy guide will help you do this.
Food Generation
You can rarely go wrong by playing a food-generating bird into the Forest right off the bat. In fact, this is usually a high-value play if it is available to you (barring some niche food-generating options in other habitats).
These birds, regardless of what type of food they generate, can be the gateway to a fast start. They increase your food production on the Core Set mat by one hundred percent, and on the Oceania Expansion mat, they increase production by fifty percent. A lowly Blue Grey Gnatcatcher can go a long way to giving you a leg up on your opponents right out of the gate.
This jump-start to food production isn’t quite as important on the OE mat since you start with one nectar in your supply (regardless of what you kept from your starting hand), and the Forest spaces are stronger than they are on the Core Set mat.
Trying to eat the cost of an expensive bird in the first couple of turns rarely pans out well, as it slows you down considerably by burning up all your early game food (this is less of a problem when playing with Oceania since you start with one free nectar). Expensive birds that make a food return on your food investment fare much better at this kind of start.
Birds such as Western Tanager (CS), Grey Crested Flycatcher (CS), and Indigo Bunting (CS) are more expensive plays but can start returning resources to you as soon as your next activation. This requires smart manipulation of the birdfeeder and taking advantage of dice rerolls to maximize their consistency.
Shared resource birds, such as the classic Hummingbirds from the Core Set, often make great accelerators early on, but they are accelerating your opponents at the same time. Sometimes these birds are your best option, though, especially when you deliberately intend to ignore the Forest, and it becomes a race to capitalize on this added acceleration in a more impactful way than other players.
Reliance on shared resource powers is often the price you must pay to focus on any one habitat to the exclusion of the other two. See Pro Tip #8: Know When to Share and Deny Resources for more.
Eggs
Eggs can be a challenge to accelerate in the early game on the core set mats because you are limited by the nest capacity of your birds in play, which won’t usually be much at that point. Nest space is less of a problem on the OE mats because the Grasslands there generate fewer eggs, and this fact tends to devalue birds whose big selling points are large nests.
Be aware of the possibility of blitzing eggs on nests of decent size (especially star nests), as this is a good way to aggressively lock in the first and second-round bonuses if they are relevant. This will net a solid nine points (close to half of the possible end-of-round points). That’s like playing an extra big point bird.
Having excessive egg production early also gives you the option of being able to leverage egg-consuming abilities that your opponents can’t afford, such as discarding eggs for cards in the Wetlands or food from Crows and Ravens. If you have a limited capacity to hold eggs, you might as well spend those resources and put them to use!
Playing a card like Chipping Sparrow (CS) or Morning Dove (CS) into the Forest is a cheap and effective way to align both food and egg acquisition into a single action. This would be a great start to any game.
A card like Scaled Quail (Swift Start Pack) is a cheap and effective way to build early game egg acceleration into your Grasslands, especially on the OE mats, as it not only fills that stinker first space but it adds its own egg to the Lay Eggs Action, boosting your Lay Eggs Action by 300% after it’s on the board. It makes an amazing egg bank/accelerator in this situation due to its ability to hold six eggs by itself.
Cards
Accelerating cards at the start of the game can quickly become a pointless act without the ability to convert them into points or resources in some fashion, whether through tucking, bonus conversions, or playing birds.
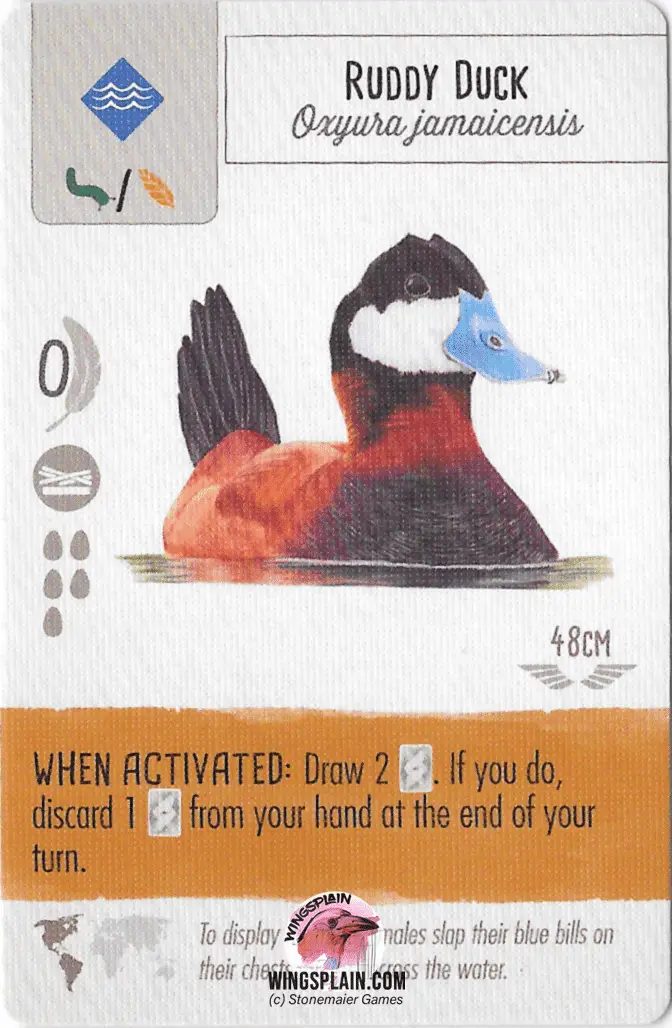
Placing a card drawing bird in the first column of the Wetlands (like Forster’s Tern, Mallard, or Ruddy Duck) is a great way to speed up your ability to generate options during the beginning stages of the game. It’s easier to draw more cards earlier on the Oceanian mats, which inherently increases the options for all players.
Excess cards can be easily converted to food through bonus conversion in the Forest, which helps when you’ve had to spend more time than you’d like digging for a suitable card to play. Without even having a bird in the Forest, you can turn one dud card into a second piece of food on the Oceania mats.
One tactic that I like to employ in some games is to just keep one card drawing bird and four pieces of food from my opening hand. This gives me the ability to dig for a cheap food-generating bird and have the food ready to play it in the forest. Once that Forest bird is played, you are now in a position to gain two or three pieces of food (depending on your mat) and continue to play the cards that you have drawn or will draw.
I call this a card drawing gambit. You’re taking on some risk by putting yourself at the mercy of the deck, but you are uncovering more options than your opponents in the earliest stages of the game, and you have some food to play the best ones.
See this video for more on effectively building engines using each habitat:
“Play Another Bird” Powers
The white powered “Play Another Bird” birds from the Oceania Expansion (Goldened Headed Cisticola, Australian Reed Warbler, and Grey Warbler) are great at early game acceleration in that they can let you drop a couple of cheap birds and ignore the single egg cost of the second column on the mat. This is excellent and should not be underestimated.
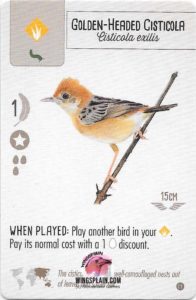
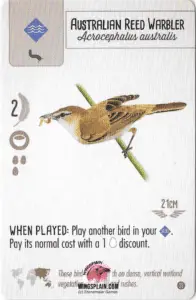
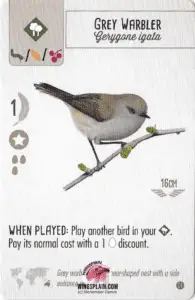
By ignoring that single egg, you’ve essentially ignored one mandatory Lay Eggs action. This has saved you an action cube, the game’s most valuable resource.
Getting these birds down also gives you quicker and easier access to the third column’s resources. That’s a double whammy against your opponents; you’ve ignored your first Lay Eggs action and gained access to better resource generation from column three. Compounding these types of efficiencies makes it easier for you to create a winning position and helps mitigate the effects of luck.
The Oceania version of this power is much better at early-game acceleration than the Core Set version, which really lends itself to dropping point bombs in the mid to late game due to how resource-intensive these plays can be. Early game eggs can be hard to come by, especially on the nerfed Oceania Grasslands, so the Core Set birds of this archetype have a harder time accelerating your game early.
Passive Engines
Passive resource engines create efficiency through saved action cubes. Pink, Teal, and Yellow powers often produce passive resource or point-scoring effects by triggering when your opponents take a certain action, the round ends, or the game ends.
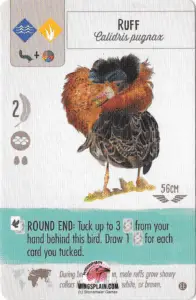
Passive resource generation is often a great option for hyper-focused, single-habitat strategies. One example would be dropping a Ruff (EE) into your Grasslands while continuously running your Wetlands tucking engine. You will probably have extra cards at the end of each round, and the Ruff can convert up to three of them into points without committing an action cube to do it. It even replaces those cards for even more cycling and card advantage.
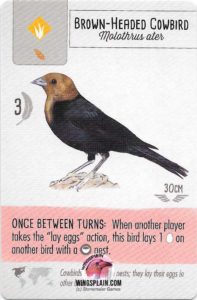
Another example would be an aggressive Forest engine that has an underdeveloped Grasslands. That player could drop a Brown-Headed Cowbird (CS) into the first column of the Grasslands for the cost of a single seed which could give you some critically needed eggs when an opponent takes the Lay Eggs action. Those eggs generated by the Cowbird will reduce your reliance on the Lay Eggs action as you continue to build out your Forest.
Even if you aren’t hyper-focused on a strategy, having a few passive effects generating free points or resources for you can give you the edge in a close game, or it can turn a probable win into a blowout victory. Furthermore, pink powers are a good way to make your opponent hesitate and think twice about their actions since the consequence is giving you free stuff, much like shared resource effects.
Pro Tip #5: Know How to Properly End Your Game; Playing Birds vs Egg Spam/Engine Spam
Playing too many birds is a potential trap. This might seem counterintuitive in a game about playing birds, but this is another lesson in action efficiency. At the end of the game, you win by having scored the most points.
There comes a point in many games where Egg Spam is the optimal point-scoring strategy (although this happens less frequently with the Oceania Expansion). You need to be able to identify the point at which you should transition from resource gathering and playing birds to instead running your engines repeatedly for the points they yield.
Sometimes you’re going to have to do some planning and a bit of math to identify your optimal scoring methods for the last few activations of the game. If it takes multiple turns to gain food and play a bird, you may be better served mathematically by just laying eggs (or spamming a tucking or caching engine) for those turns instead.
Playing birds is the ultimate victory point expression of a Forest engine that, by principle, has an abundance of food. In general, though, if you have a small total nest capacity, you’re going to end up scoring more points by pulling together the resources and playing birds that result in the highest point value possible.
There can be some deeper nuance to playing birds than just getting the required resources. Getting maximum value out of each piece of food used to play birds is a hidden aspect of the game, in my opinion. You should think about each piece of food as having three-point potential.
As far as food costs and bird point values go, the game currently establishes (as of the Oceania Expansion) that nine-point birds are the max raw point value, and they cost three food. By that measure, two food should get you six or more points, and one food should get you three or more points. I call this the “3/6/9 Scale.”
If a bird aligns with the 3/6/9 scale with just its raw point value, that is highly efficient, but you should also be considering the potential points scored from laying eggs on it and scoring points from its power in some way. This will cost actions and sometimes an egg tax (if playing birds into columns two through five), so the more value you get out of a bird’s raw point total, the better.
Birds worth fewer raw points must work harder to justify playing them. The more a bird costs and the fewer points it’s worth, the harder it must work. For example, a Red-Winged Black Bird (CS) costs one seed and is only worth two points out of the gate, but as soon as you use its power to tuck a card and lay an egg on it, it is scoring you four total net points.
According to the 3/6/9 scale, it went from underperforming on its food cost to overperforming (one food for four points) after a single activation.
Pro Tip #6: Understand Skill Vs. Luck and How to Break 100 Points
With just the Core Set and the European Expansion, scoring one hundred points can feel like quite an accomplishment. The Oceania Expansion makes this easier to pull off due to the nature of nectar and the increased availability of resources through not only player mats but also through an increased roster of birds that give resources to multiple people.
This is counterbalanced by the fact that Oceania shifts focus away from egg spamming/tucking engines and more toward food acquisition and playing more birds, so scores don’t inflate as rapidly as one might think at first.
At the macro level, scoring the most points for the least resources while aligning the acquisition of cards, eggs, and food into a single action will result in games where you score 100 points or more. Just keep in mind that the random elements of the game do exist, and not every game can end with scores over one hundred.
When you break 120 points, something out of the ordinary has happened. This is usually the result of a strong combination of cards establishing themselves early in the game and having a lot of time to express themselves. Early and effective brown, pink, and teal powers are often the backbone of the highest-scoring games.
People have demonstrated that scores higher than 140 are possible with just the Core Set, but they require The Power Four, a lot of luck on bonus card draws, and assistance from other players through shared resources.
Luck can act as a kingmaker in various scenarios involving the birdfeeder and bonus card draws. Veteran players understand what it’s like to be the victim of both a stubborn birdfeeder that refuses to produce the food type you need and bonus card draws that have zero synergy with your current game state.
Furthermore, there are times when you just don’t draw the best bird cards in general, and you must build your engines with less impactful cards. Skill can turn bad luck into a narrow victory. Optimizing suboptimal cards, dice rolls, and other circumstances is where much of the skill comes into play with Wingspan. Skill on top of good luck will produce blowout victories and the highest possible scores.
Pro Tip #7: Understand The Impact of Nectar
The Wingspan Oceania Expansion introduced a wild food type called nectar. It can be used to score extra points in a special area of each habitat on the new boards. This scoring is handled just like round bonuses but will only result in five points for first place and two points for second place. Everyone else gets zero points.
The most any one person can score in one game is fifteen points. Most of the time, it will be less than that. It’s an interesting new game element to pursue for extra points.
Whenever you spend nectar by playing a bird, discarding it for a bonus conversion/upgrading an action (see definitions), or discarding it as an appropriate cost of a power, you place that nectar on the “Spent Nectar” space of the appropriate habitat that it was spent in. Unspent nectar in your personal supply is discarded to the general supply at the end of each round, so make sure you find a way to use it.
Nectar has an interesting effect on the game. It gives a further advantage to the Forest habitat that was already buffed on the new mat. Thus, it makes it easier to play bird cards in a game about playing bird cards. This addresses some complaints people had regarding the issue of Egg Spam in the core set.
The game feels a bit more accelerated, and average scores are generally inflated by a few more points when nectar is used. It also reduces some of the decision-making elements of manipulating the bird feeder.
In the early days of the Oceania Expansion, there were opinions that the acquisition of nectar became the dominant “strategy,” and some people stopped playing with it. Other players house-ruled it to behave differently.
Personally, I think these house rules are an overreaction to the mechanical impact that nectar has on Wingspan. It does make things feel a bit different sometimes (different but good), and I think negative opinions about nectar are born from a love of the core Wingspan experience. There’s nothing wrong with that.
One important thing to remember is that gaining nectar is not always the best choice. It’s important to be able to make this distinction. The closer you get to the end of the round, the more important spending nectar becomes because you must discard it to the general supply if you don’t use it.
Nectar has a time limit each round, and gaining it for the sake of gaining it is a fruitless effort. You can’t stockpile it for point bombing in the closing turns of the game. This “nectar clock” will influence your decisions each round if you chose to hoard it. You must capitalize on it in some fashion otherwise, your actions to acquire it will have been pointless.
Don’t forget about the bonus conversions on the player mats (that is, discarding a less useful resource for a more useful one). Know how and when to use them to maximum effect. Spending Nectar on these options is optimal as you can place it on the Spent Nectar spaces of the appropriate habitat. This is also a good way to spend nectar that would otherwise have to be discarded at the end of the round.
As mentioned in Pro Tip #1: Understand Wingspan Strategy Fundamentals, increasing the player count will make it harder for any one person to run away with nectar points, as there is more competition to gather and use it. Additionally, this increases the tension surrounding this scoring option, and I think it’s why some people felt that the game had become all about the acquisition of this food in the earlier days of OE.
It can be easy to see your opponents pulling ahead in an obvious way in this category and can motivate you to chase after them, but just like with round bonuses or bonus cards, sometimes it is better to ignore these paths for actions that are more profitable for you in the long run. I think this nectar chase can be a trap for people who are not looking at the bigger picture of their personal game state. Especially if they are trying to fight over second place in a habitat for a measly two points.
Sharing resources in Wingspan is a double-edged sword. In each game, we must take whatever options are presented to us at the moment. We won’t always have access to the best bird cards. Reliance on shared resource powers is often the price you must pay to focus on any one habitat to the exclusion of the other two.
The best engines want to be activated repeatedly, but sometimes you need to take a break for food, eggs, or cards if you are missing that component of your game. Birds that give resources to everyone help alleviate your problems, but at a price. In those instances, we need to think about optimizing our suboptimal actions.
In a perfect scenario, we would never give anything to our opponents, but sometimes that action represents our best option to acquire resources ourselves, or maybe it’s the balancing factor of a powerful effect, such as Noisy Miner’s (OE) ability to tuck one card and lay two eggs (while being able to live in the Forest no less; this bird gives one egg to all your opponents as well).
This means that our best source of eggs might be a Pileated Woodpecker (CS) in the Forest, or our best source of food might be a Ruby Throated Hummingbird (CS) in the Grasslands. There are other benefits that come with these examples, such as gaining food plus eggs from either the Forest or the Grasslands respectively, allowing you to ignore certain habitats and increase the efficiency of your activations.
Activating these powers just because it’s the next bird in line is a lesson in defeat. Carelessly giving fuel to your opponents can accelerate them in a way that you may not be able to match. A shared resource bird may be a critical part of your strategy, such as a Hummingbird in your Wetlands tucking engine, but you must be tactical about its use. Is it close to the end of the game, and you’re not going to play any more birds? Skip the power.
Is it mid-game, and you drew something that would nicely build out your Wetlands engine? Then you should give that food out to all players because you need it to develop a stronger engine. In this scenario, you’ve built food production into your tucking engine to help you ignore the Forest and maximize the effectiveness of your activations by aligning the acquisition of multiple resources and points in a single habitat (this is why The Power Four are so good and are the gateway to the highest scores achievable in the Core Set).
If you’re building heavily into the Forest and you need eggs to play more birds, activating your Pileated Woodpecker (CS) will give you two eggs for your next one or two bird placements. You’re gaining food and two eggs simultaneously (if you have the appropriate cavity nests), and you don’t want to spend a turn getting just two eggs from your empty Grasslands (only one egg on the OE mat).
The consequence is that two of your opponents have cavity nests, so they will each get an egg, but the tradeoff is worth it to you. You’re gaining two eggs plus several pieces of food (and maybe more, depending on your engine) to their one egg. The efficiency of this action greatly outweighs the drawback and the inefficiency of the alternative action.
Alternatively, maybe you’ve kept a Red-Winged Black Bird and Anna’s Hummingbird from your opening hand. You play the Blackbird on turn one. On turn two, you draw, tuck, and lay an egg. On turn three, you play the Hummingbird, spending one food and the egg from the blackbird. You’ve now built an early game Wetlands engine that draws two cards, gains one food, lays one egg, and scores one victory point by tucking a low-impact card.

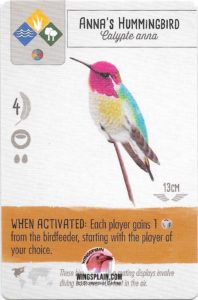
You gain all of this at the cost of handing one food to all your opponents. This is a pretty good trade-off. You are now in the position to continue to draw, generate food for your next bird, generate eggs for your next bird(s), and score victory points all from the same habitat and the same activation. It’s no longer worth it for you to go to the Forest or Grasslands for resources unless you deliberately build those out to give you more.
Eventually, you may find it valuable to drop one or two food-producing birds in the forest to give you a lot of food in one activation instead of relying on a single food from your Hummingbird each turn. This eliminates the drawback of giving your opponents food through the entire game while also increasing your own food production. This will also force you to give up points for one turn. As you can see, there are a lot of tactical decisions to be made in situations like this.
In niche cases, you may have a bird in line that checks your opponent’s resources and gives you something more based on what they have. This net gain stacks on top of what you acquire from giving something to all players.
For example, you activate a Hummingbird, and the opponent to your right happens to grab nectar from the bird feeder. Your next bird in line is Pesquet’s Parrot (OE), which now lets you gain a nectar from the general supply because your opponent now has one. You’ve gotten two food to your opponents’ one by activating a shared resource.
You’ve successfully mitigated some of the consequences of giving something to your opponents. You’ve gotten more out of it than they have. Your Parrot might even deter your opponent from taking that nectar in the first place to slow you down; the decision is now placed on their shoulders whether to give you an extra resource or not.
The key point is that you should try setting up scenarios in which you are gaining not just more but a healthy amount more from the activation of a shared resource bird than your opponents. If you just make small gains, it’s possible that your opponents can use your help to pull ahead of you in a big way that only a healthy engine or big point bomb of your own will counter.
In a worst-case scenario, your position is so bad that you are looking for any solution to get you out of what would otherwise be a guaranteed lost game. When your back is against the wall like this, you really have nothing to lose and must do whatever it takes to win.
Pro Tip #9: Learn How to Pick the Best Bonus Cards
Bonus cards in Wingspan represent one of the most random scoring elements in the game. You’re at the mercy of what the bird deck and bonus card deck give you. The more of these cards you can draw, the better your odds are of getting a card that benefits you in a meaningful way (card advantage). Sometimes luck won’t be on your side, though and your bonus cards won’t align with the strategy you’ve committed to.
Having good situational awareness will help you determine if you should ignore certain bonus cards or not. For example, if you’ve managed to build into a strong Wetlands tucking engine, it doesn’t pay to focus on meeting the requirements of Forester (CS).
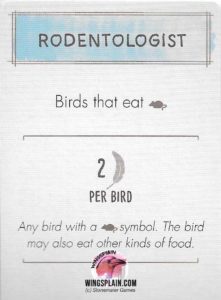
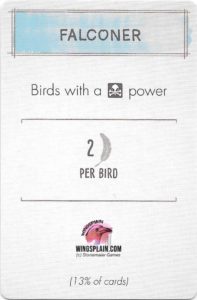
The bonus cards that make the most consistent impact are the ones that give flat points per bird, require a small number of birds to score, and/or overlap a larger number of birds. Rodentologist (CS), Falconer (CS), Platform Builder (CS), Large Bird Specialist (CS), and Diet Specialist (EE) cast a very wide net over a lot of birds that happen to be worth five to nine points.
If you start to collect a lot of rodent-eating predators, birds that let you draw bonus cards should probably become priority plays, if possible, as you stand to score a lot more points by drawing superior bonus card options. Ethologist (EE), Ecologist (CS), and Oologist (CS) are examples of “neutral” bonus cards that consider every bird you play and are easier to score points from.
Flocking (Tucking) birds tend to fall into a large group that qualifies for Bird Counter (CS), Citizen Scientist (CC), as well as Backyard Birder (CS) and Bird Feeder (CS). The negative aspect of these bonus cards is that it takes a larger quantity of birds to qualify, and those birds are usually worth four or less points. For these reasons, bonus card birds should probably be less of a priority if you’ve built a strong tucking engine comprised of several flocking birds.
Bonus cards that have a low barrier for entry, such as Viticulturalist (CS), Diet Specialist (CS), Prairie Manager (CS), or Anatomist (CS), can be an easy three points, only requiring two birds to get there. They also have a low ceiling on the top end, often getting you 6-8 points with just four qualifying birds. Despite lower percentages, all it takes is a Ruddy Duck (or a bird like it) in the Wetlands, and you’ve got a realistic shot at seeing some of these cards (from playing more bonus card birds).
The listed percentages on each bonus card can become a trap for people if they aren’t paying attention. If you’re drawing a lot of cards, the percentages on bonus cards can throw you off from what is really happening. These numbers represent the number of qualifying birds in the deck. If you’re seeing more cards per turn than your opponents, the likelihood of you fulfilling the requirements of your bonus cards is higher. This is a prime example of card advantage at work.
Pro Tip #10: Know When to Focus on Round Goals and Know When to Ignore Them
The twenty-two points available through end-of-round goals in Wingspan are also some of the most luck-dependent points in the game. Once the round goals have been randomly selected, they cannot be changed.
There will be occasions when it doesn’t make sense to pursue these goals. Such as when the “Sets of Eggs In Each Habitat” goal shows up for round one. It’s pretty difficult to build into that during the earliest stages of the game. This is another scenario where having a strong situational awareness will allow you to determine your most efficient actions. Sometimes it might not make sense for you to chase an end-of-round goal.
Higher player counts will make it more difficult to score round points with minimal investment. For example, two or three opponents could luck into opening hands that favor Forest engines when the round one or round two goal is “Birds in the Forest.” If you have an opening hand that is more favorable to the Wetlands, it wouldn’t make sense for you to go out of your way to compete for those four-round points, especially once you see them dropping Forest birds during their first couple of turns.
In a two-player game, it would make a lot more sense to squeeze in a single Forest bird since that’s all it would take to win the second-place points. You might even be able to drop that second Forest bird on your last turn to steal the first-place position with the minimum expenditure of resources.
Pro Tip #11: Understand the Power and Versatility of Star Nests
Star nests can go a long way to easily locking in points since so many goals are egg-based. They check birds with specific nests or the number of eggs in a specific nest type. Any bonus card that checks for specific nest types also counts star nests.
These nests lose some of their impact as more expansions add more bonus cards and round goals that don’t take nests or eggs into consideration. But, if you’re playing with just the core set, star nests are at their peak usefulness.
Pro Tip #12: Lean How to Objectively Assess Card Quality
A card is at its best in Wingspan when….
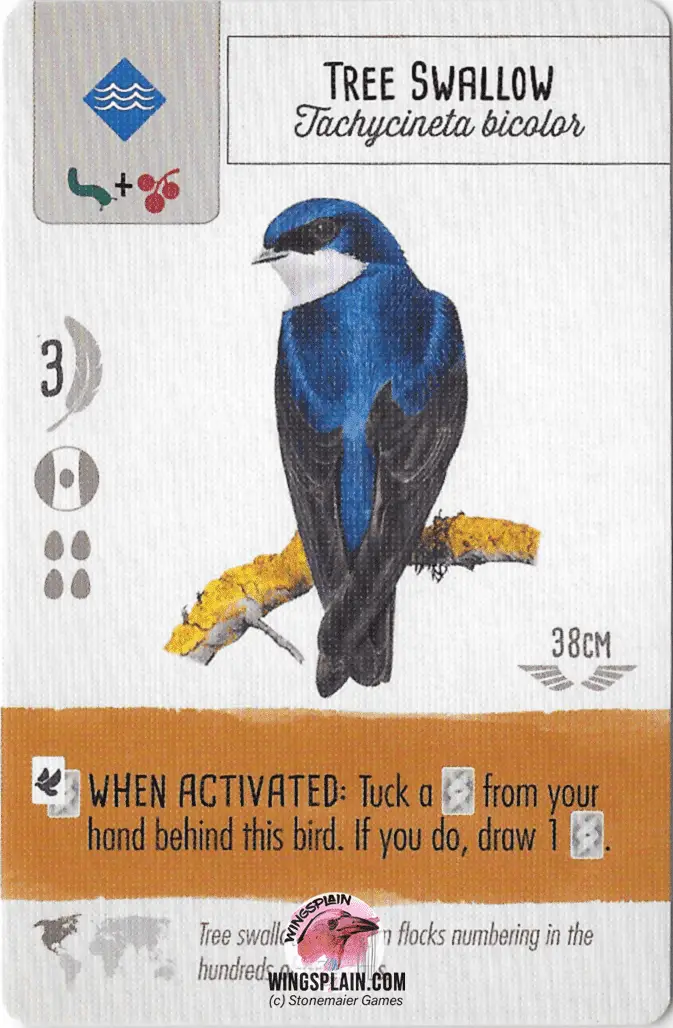
- It goes in a habitat that fuels its power. This means that the card spends a resource that is produced by the habitat that it lives in. Examples include Chihuahuan Raven (CS), a Grasslands only bird that spends eggs to produce food, and Tree Swallow (CS), a Wetlands bird that tucks a card from hand and then allows you to draw a card to replace it.
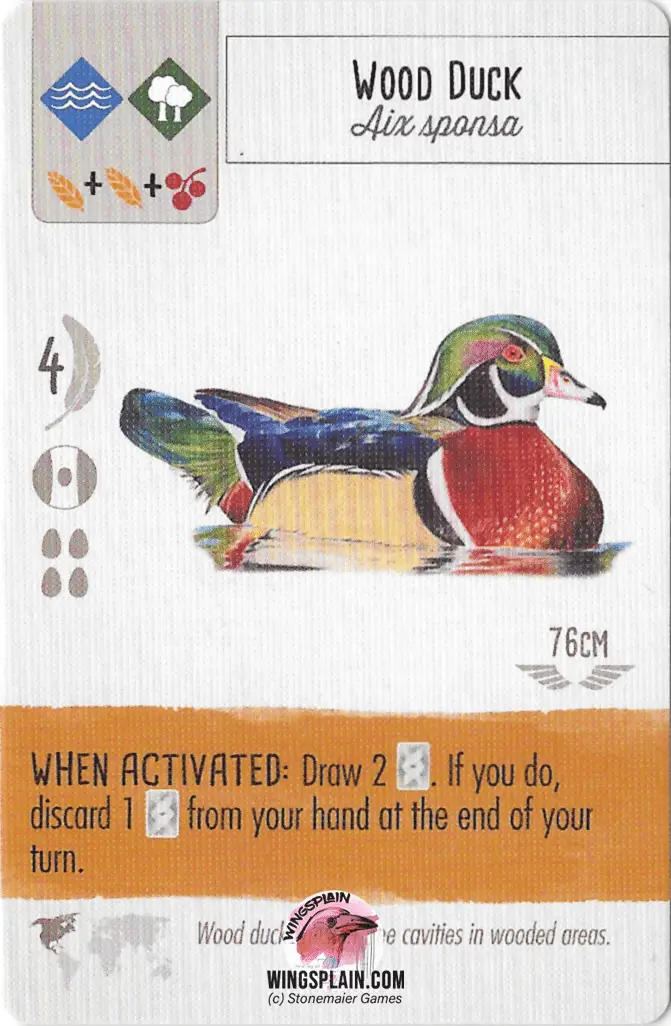
- It produces a resource that is out of the ordinary for the habitat it lives in. A good example of this is Wood Duck (CS), which is one of the rare effects that let you draw cards from the Forest.
- It doesn’t require another bird to produce its full effect. A good example of this is Maned Duck (OE), which allows you to tuck up to three cards behind it and produce a single seed when you do. In Contrast, a card like American Avocet (CS) requires a different bird with the appropriate ground nest in play to benefit from its pink power.
- It has a Star Nest. This versatile nest type opens the possibility to score with any bonus card, round goal, or bird power that targets a specific nest type, as star nests count as all nest types.
- It has a “ * ” wingspan. A wild wingspan can count for any game effect that checks a specific value.
- Its power produces victory points. This can come in the form of egg-laying, card tucking, food caching, bonus card drawing, or allowing you to play another bird.
- It doesn’t give resources to your opponents. You want to minimize this as much as possible unless you happen to be playing cooperatively in some way.
- It has any amount of wild in its food cost. The less specific food requirements are, the easier it is to play that bird.
- It produces nectar. Nectar is a wild food source and can be used to score in the appropriate habitat on the Oceania boards. It is the best food type to have in your supply unless the round is about to end.
- It produces more than one net resource per activation. The more you produce per activation, the more efficient your activations are.
- It caches food from the birdfeeder or better yet, the general supply.
- It tucks cards from the deck and not your hand.
- It turns resources from other cards into points. For example, Spotted Towhee (CS) can produce a seed and Canada Goose (CS) converts that seed into two points by discarding it and tucking two cards from the deck.
- Its general qualities don’t interfere with its effectiveness. For example, if a bird can lay a lot of eggs on itself but its nest is exceedingly small, its power is in direct conflict with its nest size which interferes with its overall performance. Thekla’s Lark (EE) suffers from this problem.
- It has a large nest. The larger the better. The more eggs a bird can hold, the more points you can theoretically score. That being said, large nests are harder to take advantage of on the Oceania Expansion mats as they generate fewer eggs per column.
- It scores two or more points per activation of a brown power. Good examples include Galah, Canada Goose, and any Tuck/Lay bird.
- It has a power that converts non-scoring resources, such as unneeded food in your supply or cards in your hand, into points you wouldn’t otherwise score. Australian Raven (OE) is a good example of this.
- Its power lets you look at more than two bonus cards, increasing your ability to filter out bad cards. Scoring points with Bonus Cards is one of the most luck-heavy elements of the game. You probably aren’t going to see very many of these cards and of the ones you do see, how many are going to line up with what you have in play? The Core Set established a hard limit of drawing two bonus cards and keeping one as a part of power. The Oceania Expansion introduces powers that let you look at more than two bonus cards in a draw, but you still only get to keep one, unless it also has you discard a bonus card, in which case it lets you keep two (a net gain of zero bonus cards but with theoretically better quality). The more Bonus Cards you can look at in a draw, the less impactful luck will be.
- It scores three or more raw points per food in its cost. There are a few birds that score five points for the cost of one food. These cards would be good even if they didn’t have a power attached to them. They represent some of the most efficient activations in the early to mid-game, especially before strong engines get rolling.
- It is worth eight to nine raw victory points. This is currently the top end of what you can expect for raw points at a cost of three food.
- It has a passive point-scoring power. Anything that helps you win without costing you an action cube is highly efficient.
- It doesn’t cost many resources. The cheaper a bird is, the fewer actions it takes to get it onto the board. The more power and efficiency you can pack into lower food cost birds, the better.
- It qualifies for many bonus cards. This helps reduce the impact of luck as it pertains to draws. Bonus Cards are a rare acquisition, so we want them to score as many points as possible when we finally get to draw some. Rodent eating predators with platform nests and large wingspans are a prime example of a bird archetype that qualifies for several strong bonus cards (Rodentologist, Falconer, Platform Builder, Large Bird Specialist). Additionally, birds with star nests qualify for all nest-based bonus cards.
- It qualifies for several round goals. This helps reduce the impact of luck as it pertains to round goals. For example, birds with star nests of a decent size can go a long way to securing first place for many egg-centric goals with just a single card.
Discover What Makes a Top Tier Bird Card in Wingspan
Pro Tip #13: Know When Bad Cards Are Good/Know When Good Cards are Bad
In my opinion, newer players tend to focus on a card’s power and use that as the sole qualifier for whether the card is good or not. For example, Horned Lark (CS) is generally regarded as a “bad card” because its pink power can be difficult to utilize consistently (since it requires you to tuck from your hand instead of from the deck).
People generally disregard that it is a five-point bird that can hold four eggs for the cost of two food. I don’t often play this card myself but there are some situations where I need egg capacity immediately to support my strategy and Horned Lark has sometimes been my best option at that moment.
There are other times where a card like Horned Lark qualifies for several round bonuses or bonus cards (namely Bird Counter) and becomes a big point play. Some people end up missing this because they immediately blow it off due to the popular opinion that it is “a trash card”. They don’t look at the card through the lens of their current game state.
Burrowing Owl (CS) is another good example. This bird is rarely the topic of conversation. Its power is “Roll dice outside the birdfeeder…” which is regarded as one of the worst effects in the game. Disregarding this feature of the card, the owl is a five-point bird with a four-egg star nest for the cost of two food.
That is helpful and I’m usually happy when I see this bird come up as it can help secure multiple round bonuses simultaneously. It even qualifies for Falconer and Rodentologist which can add two points each to this bird
On the flip side of the coin, Ruddy Duck is a great early game accelerator with its ability to let you look at and draw a large volume of cards for the cheap cost of a single food. It also has an above-average nest size of five.
These qualities are much less impactful in round four. It’s worth zero points so it doesn’t make an effective point bomb and there aren’t many activations left in the game to take advantage of its power. There is very little reason to play this great card this deep into the game.
Pro Tip #14: Understand the Wingspan Metagame
The North American (Core Set) Metagame
The North American (core set) metagame favors efficient egg spam/tucking Grasslands engines and deep wetlands “Full Tuck” engines as the best win conditions. Effective Forest engines are harder to employ but the best are built on the back of cheap food caching birds, cheap birds that are able to produce eggs, and Wood Duck for card advantage outside the Wetlands. Early game acceleration is at its prime in the Core Set, with cheap food producing and card drawing birds being plentiful and highly effective.
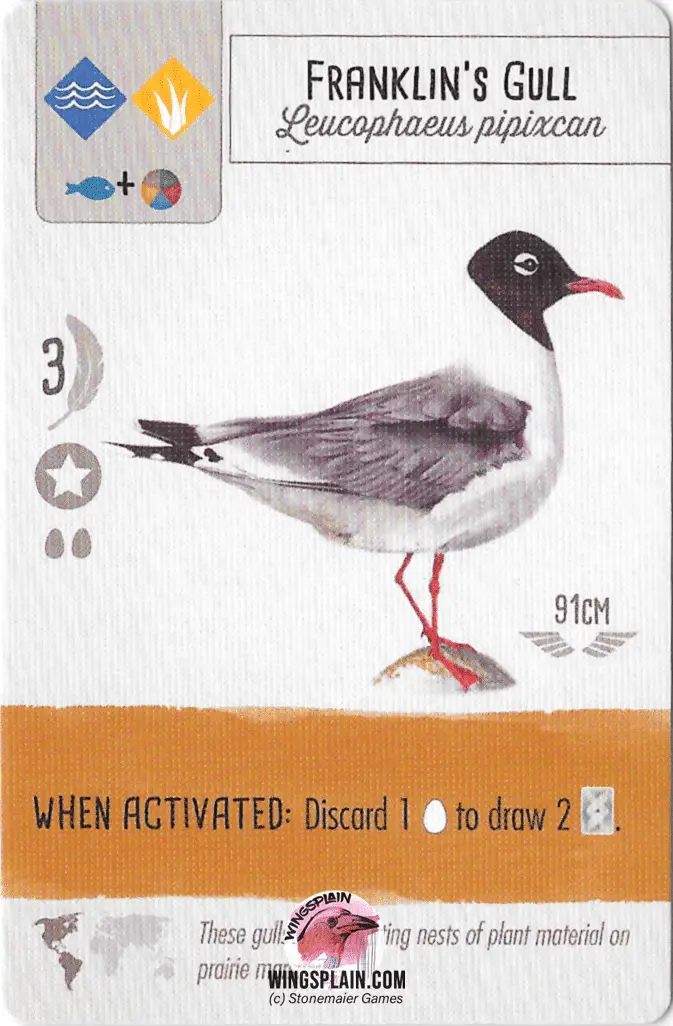
It’s in this set that you are introduced to the most powerful cards in the game: Chihuahuan Raven, Common Raven, Killdeer, and Franklin’s Gull. Their food gaining and card drawing abilities are second to none. Engines that can produce food and/or cards from the Grasslands tend to be the most effective.
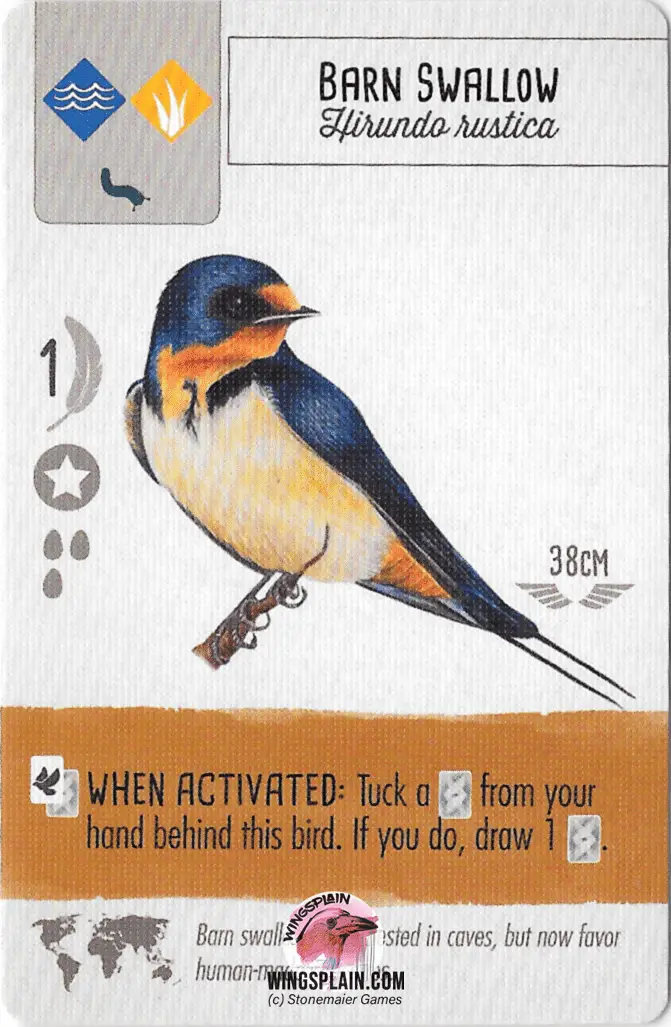
Birds such as Anna’s Hummingbird, Ruby Throated Hummingbird, Fish Crow, and American Crow are other highly effective options. Ruddy Duck (and the other “draw 2/discard 1” birds like it), and Barn Swallow (and other tuck/draw birds like it) are other stand out cards of note for their point scoring and card drawing/card cycling abilities.
The European Expansion Metagame
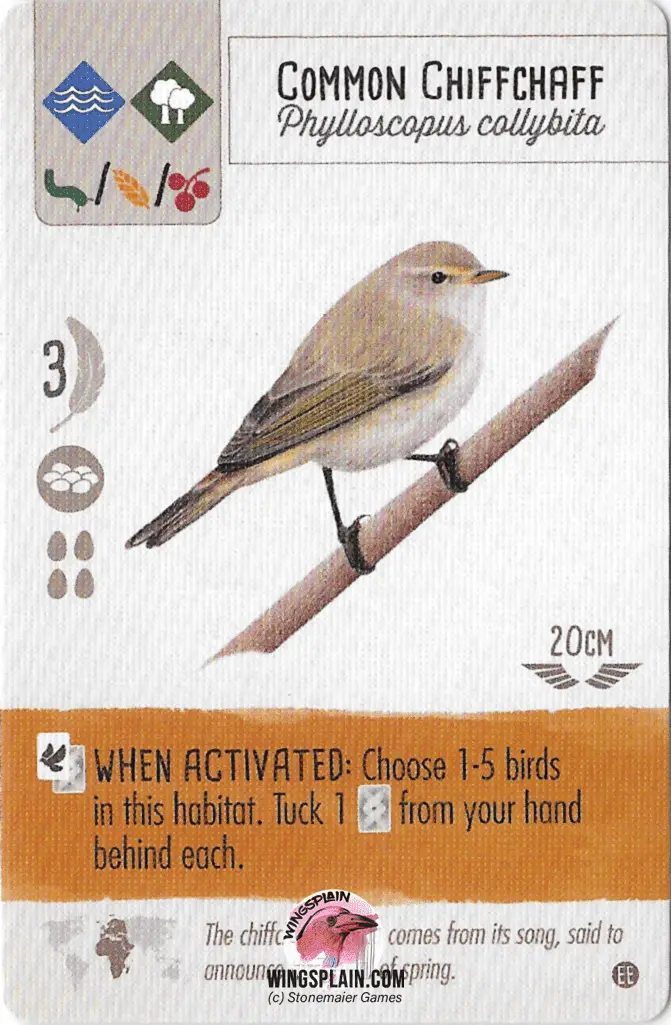
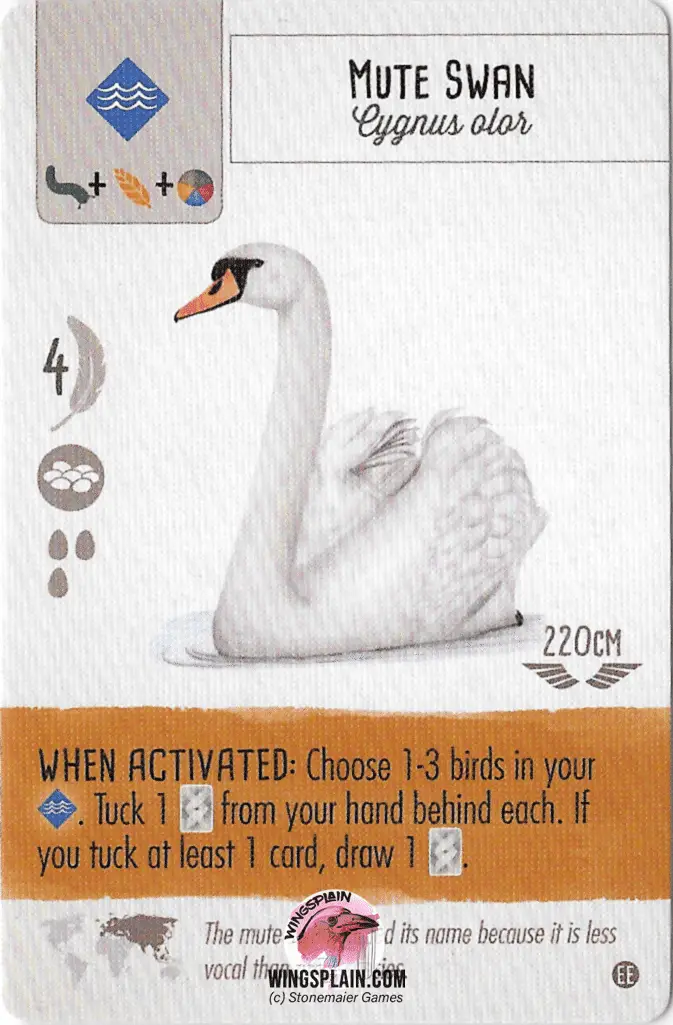
The European metagame (played with the core set mat) is similar to the core set metagame but it introduces many more options to tuck large volumes of cards through “mass tucking” effects, as can be found on Common Chiffchaff, Common Chaffinch, and Mute Swan. This set also introduces Teal powers which allow you to passively generate points and/or resources outside of your established engines round to round.
A variety of new effects are explored such as birds that steal food from opponents, new ways to cycle/draw cards, birds that can be played sideways, and predators that can be played through alternative methods, allowing you to ignore their food cost as a result.
White Stork, Bonelli’s Eagle, and Eastern Imperial Eagle are birds of note that that have made the biggest impact in the tournament community. White Stork is an eight point bomb that produces cards from the Grasslands while recycling the bird tray, a highly desirable effect. It’s fairly easy to play as far as three food cost birds go, but you need to make sure you have the proper nest support to hold all the eggs you’ll be generating in the early game.
Bonelli’s Eagle and Eastern Imperial Eagle are unrivaled point bombs in that their alternative play cost of tucking up to three cards instead of paying their three rat food cost makes them incredibly easy to play by the end of the game, converting dead cards into massive points.
The 81 cards added in this set represent a 45% increase to the Core Set card pool; 84% of those cards cost two to three food to play. As a result, this slows down the game and lowers average scores. Early game acceleration is negatively impacted, making cheap food producing and card drawing birds super premium. There is a decrease in the total percentage of bonus cards and round bonuses that check eggs and nests so lager nests and star nests tend to be less valuable on average.
The Oceania Expansion Metagame
The Oceania metagame favors the acquisition of food, specifically nectar, and playing more birds worth more points. The redesigned Forest produces more food, the redesigned Wetlands produces more cards, and the redesigned Grasslands produces fewer eggs. The 95 cards introduced in the Oceania Expansion represents a 53% increase to the core set card pool. 70% of those cards cost two to three food but unlike the EE meta, the OE meta does not slow down since food is so much easier to get.
Playing more birds on average increases the usefulness of bonus cards and the birds that draw them. There tends to be a bit less emphasis on engine building and egg spam is generally a bit less effective. There is also a decrease in the total percentage of bonus cards and round bonuses that check eggs and nests so lager nests and star nests tend to be less valuable, especially if you are also playing with the European Expansion.
As a general rule, playing with Nectar and using the Oceania Expansion mat will reduce the effectiveness of cheap food-producing birds. This is due to three major factors:
- Food is easier to generate from the redesigned Forest
- Nectar lessens the impact of a stubborn birdfeeder
- A general increase in the number of birds that give resources to all players
Due to generally increased food availability, higher point value birds that have higher food costs are easier to get on the board. This results in a devaluation of cheap birds, which are generally worth fewer points and are often the anchor point of many kinds of engines.
The exception to this rule will be birds that cost one food, are worth four to five points, and qualify for valuable bonus cards, such as Falconer, Rodentologist, Food Web Expert, and Omnivore Specialist. These bonus cards greatly inflate the value of birds that are already pushing the limits of food efficiency.
Due to less focus on engine building, low point value Tuck/Draw birds tend to have less of an impact. Conversely, egg-laying effects have more of an impact when using the Oceania Expansion mat, especially when those powers are played into the Forest, since eggs are a bit harder to come by. A strong Forest engine is likely to have excessive amounts of food and this can easily be converted to eggs from the redesigned Grasslands by the mid-game/late-game.
Spangled Drongo is a bird worthy of note for its ability to punish and shut down opposing Nectar gaining birds. Galah, Maned Duck, and Noisy Miner are impactful cards of note for their ability to generate a lot of points in a short period of time.
Wingsplain on YouTube
I record and post my tournament games on YouTube so you can see the practical application of the information covered in this guide. I’d greatly appreciate your subscription.
Link to our channel: Wingsplain Gaming on YouTube
About Us/Donation/Definitions
Our History With Wingspan
I remember the first time I saw this game sitting on the shelf at a local store and there was just something about that blue box and that unidentifiable white-pink bird looming over me that just caught and held my attention. The large image of the Scissor-tailed Fly Catcher stretched across the box and the game’s name, WINGSPAN, made implications about what was inside.
I think I walked past it on two different trips before I began looking into what this game was about and quickly realized it was something that I wanted to play, and even better, I suspected that it would probably be something that my wife would want to play with me. I was right.
In November of 2020, I had the idea of writing about this new game that my wife and I loved playing. I spoke with her about it (she’s a knowledgeable blogger/web designer) and shortly thereafter Wingsplain.com was born. It’s been fun being on the front line of Wingspan strategy discussions and watching the various player communities grow with the game. I look forward to sharing my thoughts with you.
Thanks for checking out the leading Wingspan Strategy Guide, “The Winning Edge”! This guide is the result of over a year’s worth of thinking about, writing about, talking about, and of course, playing Wingspan. In this Guide, I’ve captured what I feel are the core concepts, philosophies, and fundamentals of playing this game effectively. This has really been a labor of love.
Definitions Used in This Guide
General Qualities: A bird card’s Habitat Access, Nest Size, Nest Type, Point Total, or Wingspan.
Point Bombs: Single actions that result in a lot of points.
(CS): Core Set
(SS): Swift Starter Pack
(EE): European Expansion
(OE): Oceania Expansion
(PAB): Play Another Bird
(BCB): Bonus Card Bird
The Power Four: Chihuahuan Raven (Core Set), Common Raven (Core Set), Killdeer (Core Set), and Franklin’s Gull (Core Set)
Tuck/Lay Birds: Birds that have a power that lets you tuck a card and then lay an egg on a bird.
Tuck/Draw Birds: Birds that have a power that lets you tuck a card and then draw a card.
Mass Tucking Bird: A bird that tucks three or more cards per activation, either under itself or other birds as specified.
Egg Spam/Engine Spam: Strategies that involve taking the Lay Eggs Action or some other point-scoring action repeatedly.
Nerf: To make something mechanically worse than it was.
Buff: To make something mechanically better than it was.
Engine: a combination of cards that produce a cumulative effect.
Engine Building Game: A game, like Wingspan, that is built around the concept of creating an “engine” that generates resources and points through successive use.
Shared Resource Birds: Birds with powers that give food, cards, and or eggs to multiple players.
Bonus Conversion: Some columns on the player mats allow you to discard food, eggs, or cards for a different resource. The Wingspan Core Rule Book calls this a Bonus Conversion. The Oceania Expansion Rule Book calls this “upgrading an action”.
Metagame / Meta: The specific environment in which certain things occur. In Wingspan terms, something that might be powerful or effective when playing with just the Core Set might not be as effective when introducing an expansion. Conversely, something that might be “bad” in one set might burn out to be amazing once you introduce an expansion. As an example, If you introduce the Oceania Expansion to your Core Set experience, you could then refer to your game as functioning in the “Oceania Metagame”.

Best explanation of Wingspan strategy I have seen so far!
Thank you.
Hello Jason and Lisa!
I’m an avid fan of WS, and even though I was introduced to the game by my wife, now it’s me who’s begging for “a game of birdies, please?” every evening. I think that I’m reasonably well versed in card/boardgames in general, as in WS specifically, so I hope that when I say that your article is amazing, I shouldn’t be completely wrong.
Very nice analysis and I really like your style; I also like that you didn’t concentrate only on the latest development, but you still provide feedback and ideas about the basic game. You approached many aspects from many angles, and I enjoyed every second of reading.
Yet still – this wouldn’t prompt me to write you, but then I’ve read the passage dedicated to Horned Lark and Burrowing Owl. This ringed so true! We disregarded those birds for far too long, they are two-food, five-points birds with maybe a weak ability, but an ability nonetheless. Moreover the rodent-gamblers are such a cute birds! They deserve more than just being tucked away.
Thanks for the article, cheers!
Thanks so much for the compliments. We really appreciate it.
WS “physical board” daily playing family for over one year now combining x3 WS expansion packs. (Asia expansion arrived today!). We have made some enhancements. “Don’t think just Buy”……. a “good” auto dice roller big enough to hold all 5 WS oversized dice! and a good auto card shuffler, Battery operated is fine. As advanced players we find the out of the box board too short a game to develop a “working engine”…..so what we have done is take the basic playing mat and put it under the newer playing mat with the last two card columns added at the end as an overlap/extension to the board. This expansion provides an extra two columns which for advanced players allows the engines “to fire up” for longer and produce throughout the game. Also……we have noted that a player who gains a good (end of round) turquoise card will invariably have a consistent/winning advantage if other players fail to secure one. To this end we are trialing that all players start the game with a “take eggs” turquoise card at the end of the round card. So far this has proven to spread the advantage whilst placing emphasis to engine optimising/building. In summary these refinements steer the game more toward engine optimisation + rewards on the hard work of building them while retaining the core essence of WS.
Most appreciative of you adding additional comments regarding Oceania, nectar and different board lay out, change so much of the game. Much of the mechanics of birds and engines completely change with this version.
Hi, is there also an printable version of this guide available?
Hello. We do not currently have a printable version of this guide.
My wife and I have been playing this for a month now. After rereading this guide, many things make a lot more sense. Thanks! I can see that we’ll be rereading this many more times in the future.
Our EE arrived today, and we gave it a whirl. We both suffered a little with food production in the early game, as you allude to above.
I was fortunate to acquire White Wagtail (EE) in the first round. It has a round end action of playing another bird, which I was able to utilize in all 4 rounds! This was like having 4 extra cubes. I’m surprised it doesn’t get a mention above.
Thanks for checking out the guide! I’m glad you and your wife are having fun. I remember when my wife and I started out. We refer to the White Wagtail archetype of birds as Teal PABS (PAB = Play Another Bird). If you want to hear my commentary on these birds and see them in action, you can find a bunch of my videos in this playlist on my youtube channel.